Getting started
Setup is one time. After it, everything is a question to your agent.
1. Install DeltaForge
Download DeltaForge below, then open the installer to place it in your Applications folder.
On first launch, macOS asks for keychain access. Allow it: this keeps the API keys you enter into the app secure.
Download for Apple siliconDownload for Intel-based MacNot sure which Mac you have? Apple menu → About This Mac. The chip line tells you.
2. Connect your brokerage
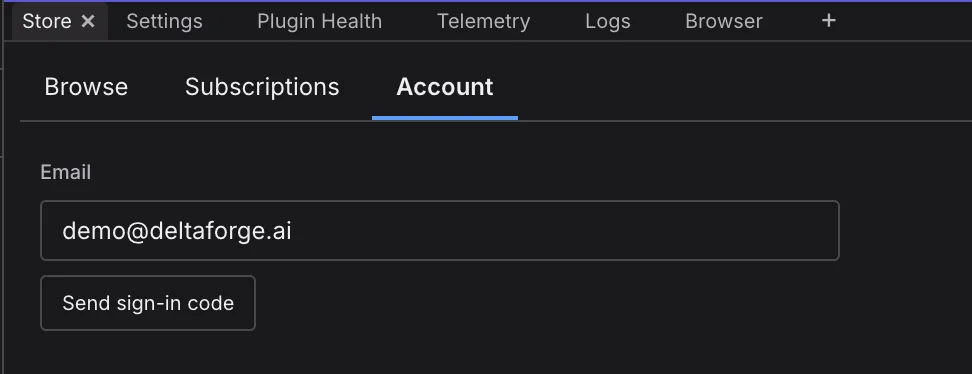
Open the Store tab and go to the Account subtab. Enter your email and click Send sign-in code, then enter the code that is emailed to you and click Sign in.
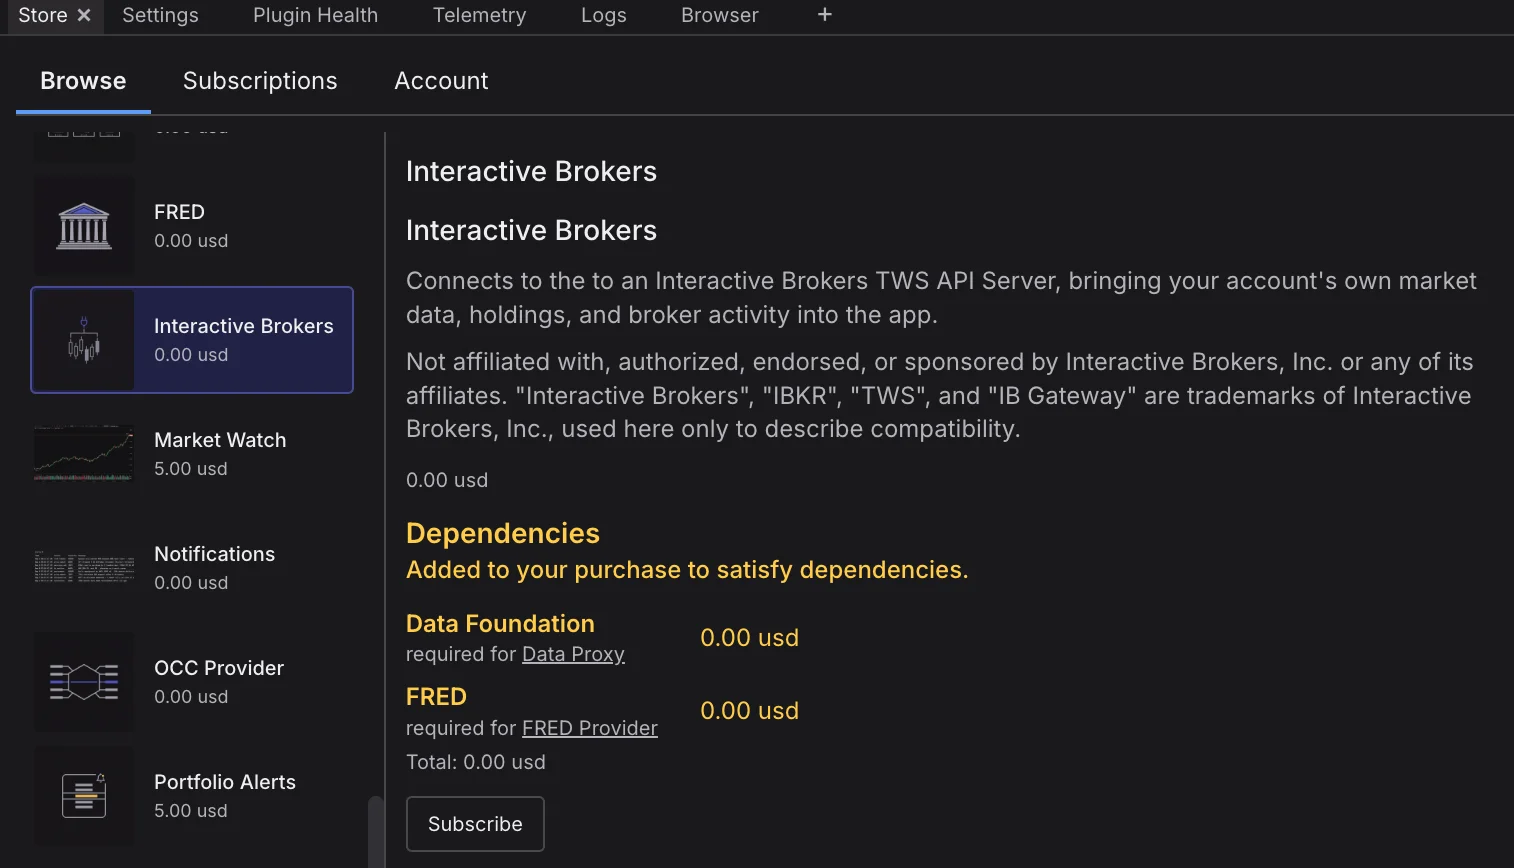
On the Browse subtab, select the broker integration you want, Interactive Brokers (IBKR) or Schwab, and click Subscribe. Brokerage and data connections are free, so subscribing costs nothing. It also adds the Data Foundation and FRED bundles.
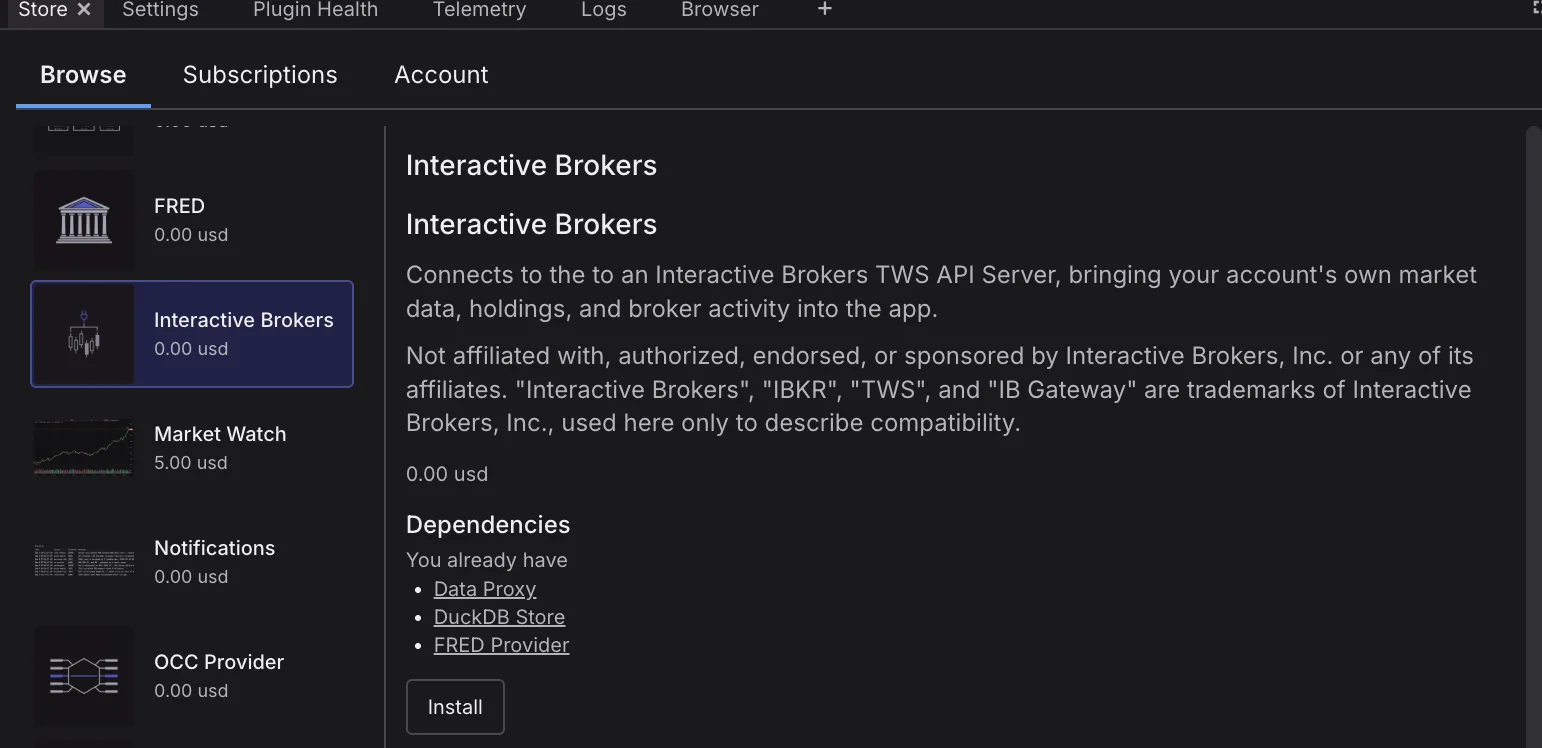
After subscribing, click Install. Installing also installs its dependency plugins from the Data Foundation and FRED bundles.
3. Configure your brokerage connection
Follow the steps for the brokerage plugin you installed.
Interactive Brokers (IBKR)
Start a TWS or IB Gateway session and keep it running.
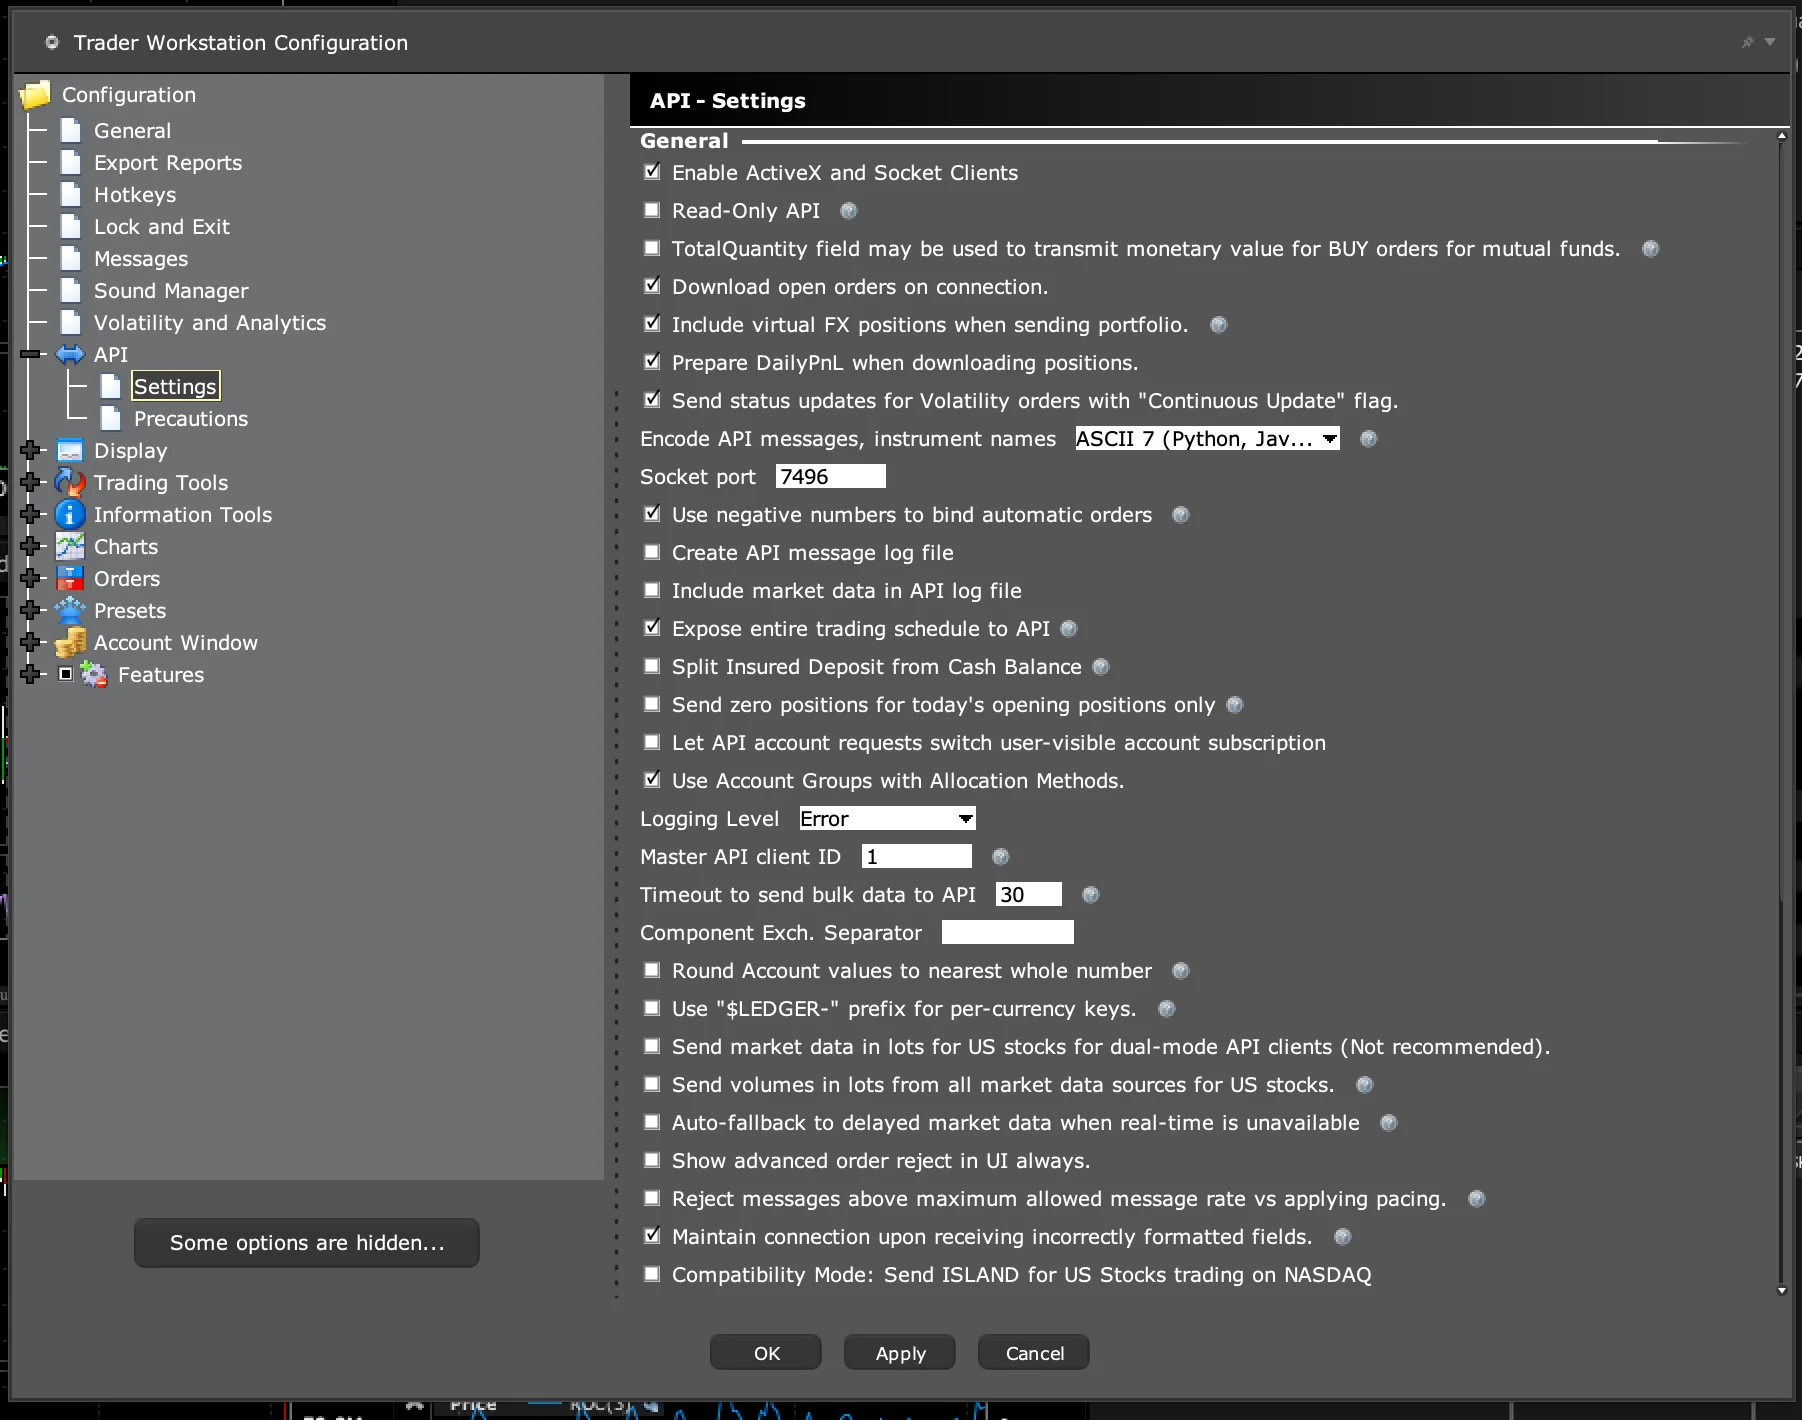
In TWS, open Configuration → API → Settings:
- Check "Enable ActiveX and Socket Clients".
- Check "Prepare DailyPnL when downloading positions."
- Set "Encode API messages, instrument names" to "ASCII 7 (Python, Java...)".
- Choose a Socket port (7496 in the example). You will enter it in the app.
- Set "Master API client ID" to the Client ID you will enter in the app.
- Leave "Send market data in lots for US stocks for dual-mode API clients" unchecked. Volume must NOT be sent in lots for any data type.
- Leave "Send volumes in lots from all market data sources for US stocks" unchecked.
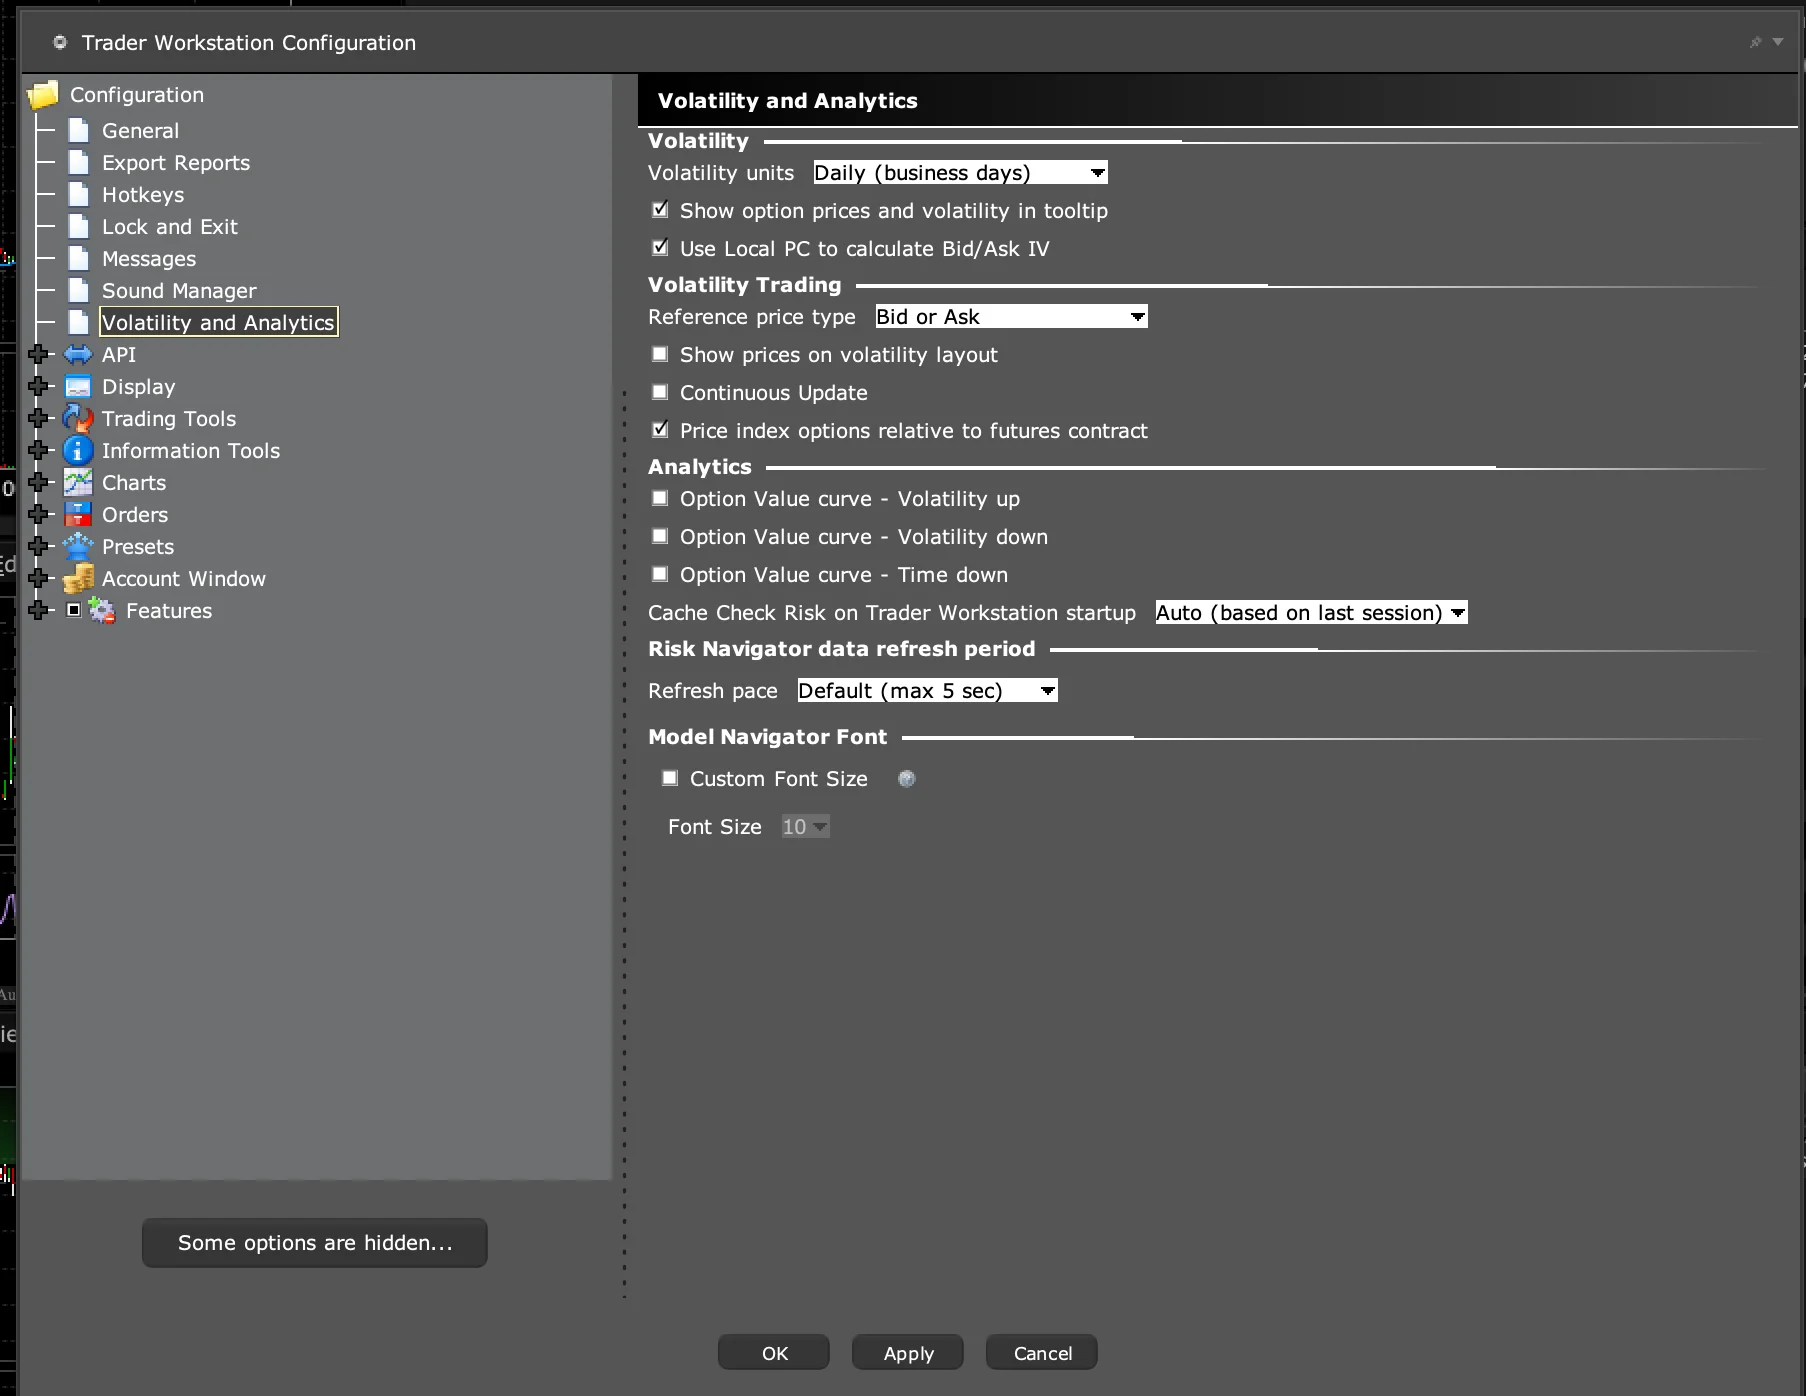
In TWS, open Configuration → Volatility and Analytics and note the "Volatility units" setting, for example Daily (business days).
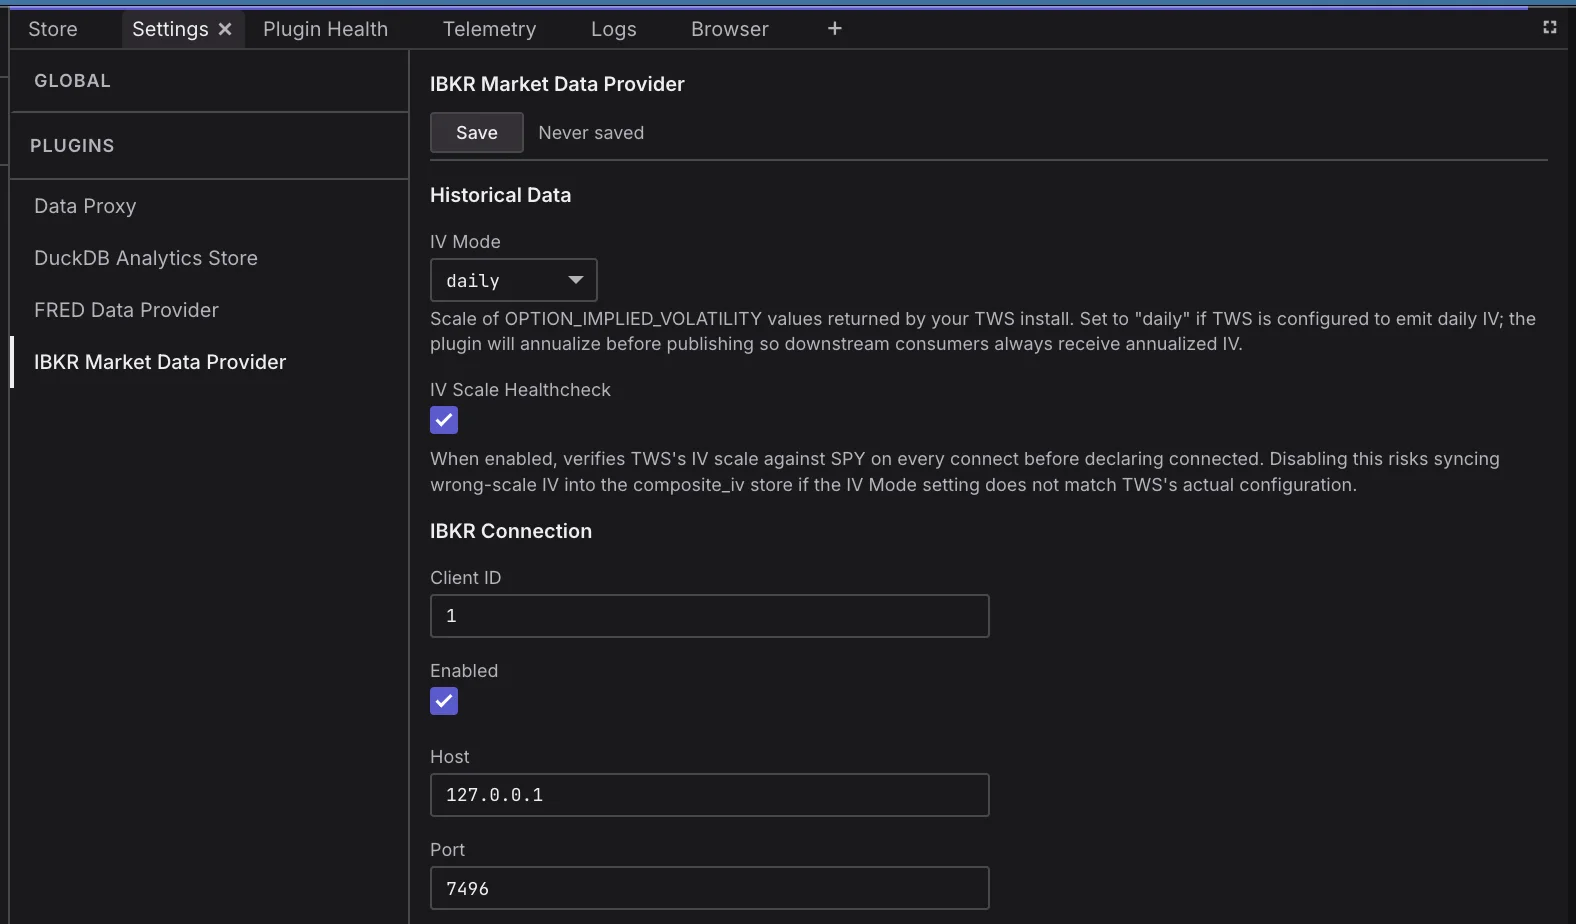
In the app, open the Settings tab and select IBKR Market Data Provider in the Plugins list. Under Historical Data, set IV Mode to match the TWS Volatility units (daily if TWS is set to daily). Under IBKR Connection, enter the Client ID (the same as the TWS Master API client ID), the Host (127.0.0.1 when TWS runs on the same Mac), and the Port (the TWS Socket port). Check Enabled, then click Save.
Schwab
Sign in to the Schwab Developer Portal (https://developer.schwab.com/login) and create an Individual developer app. Set its Callback URL to
https://127.0.0.1:<port>(8182 in the example) and wait until its Status is Ready For Use. Copy its Client ID and Client Secret.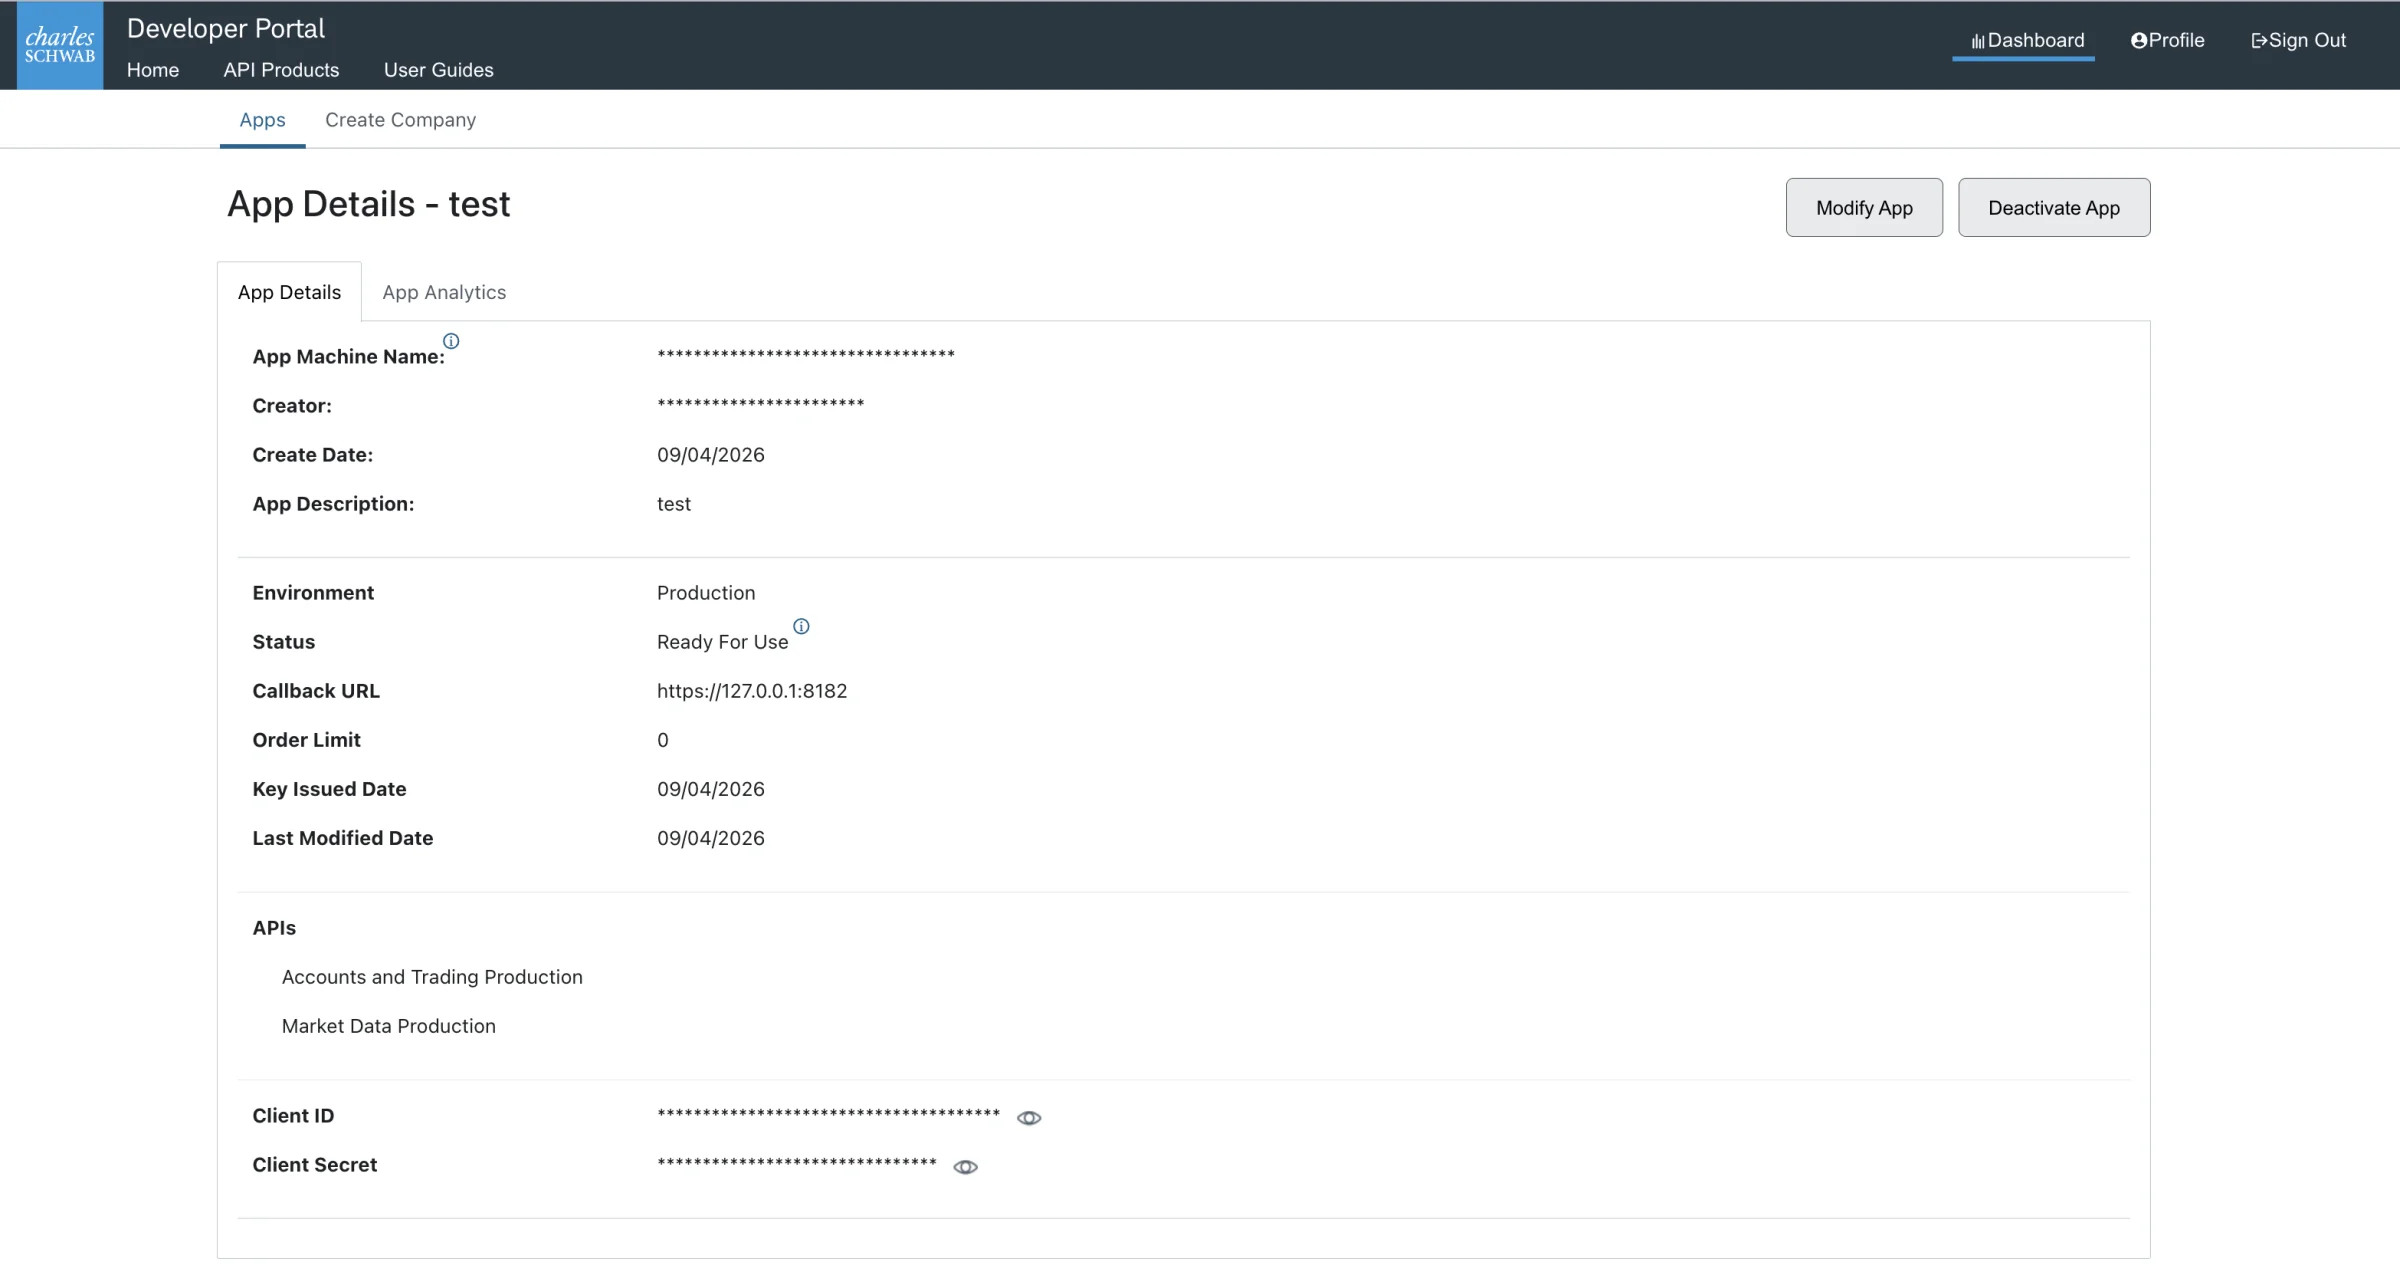
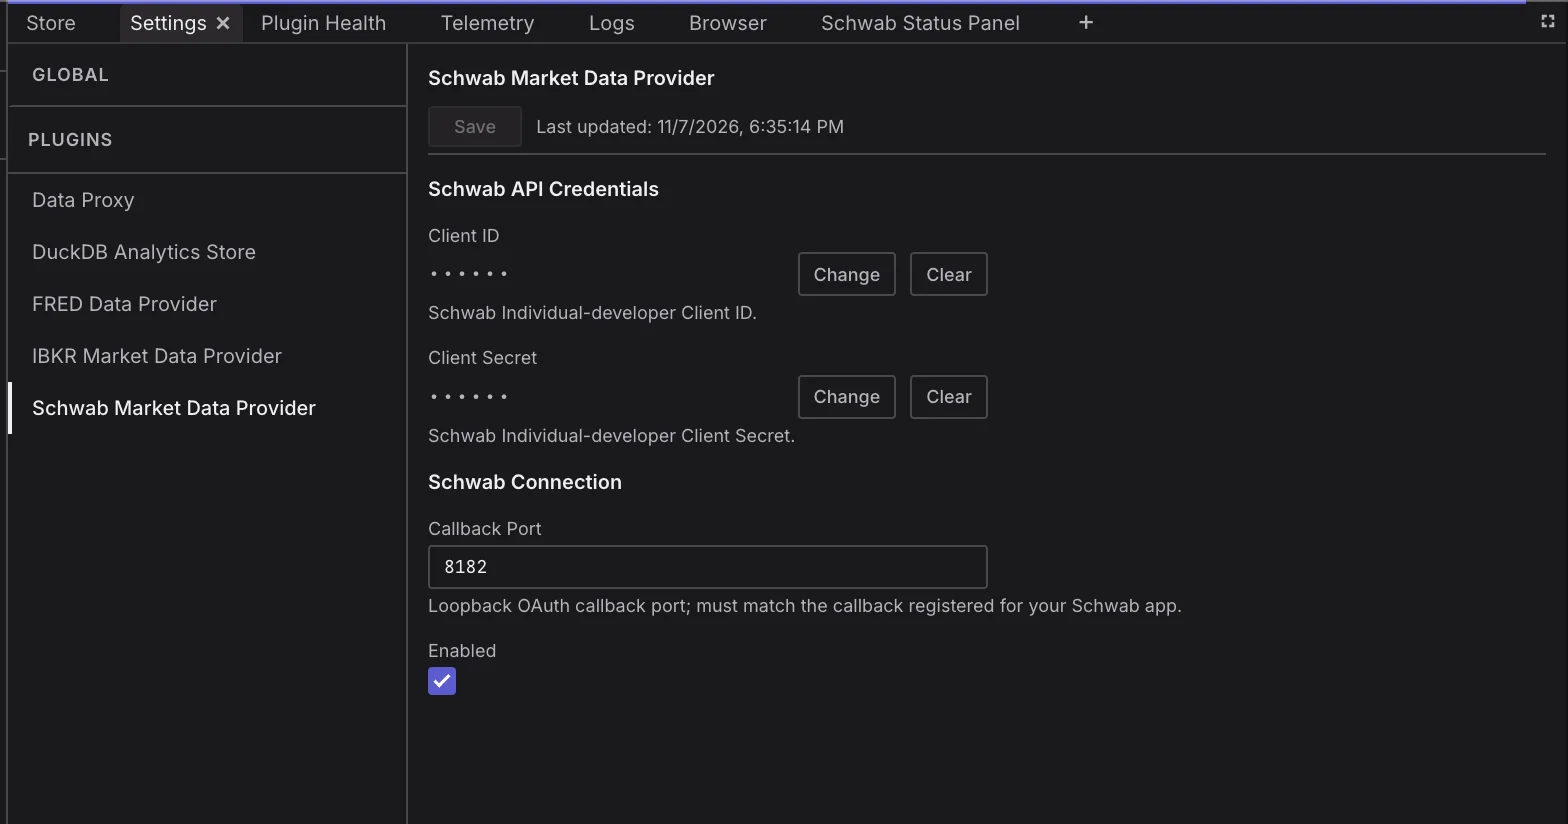
In the app, open the Settings tab and select Schwab Market Data Provider in the Plugins list:
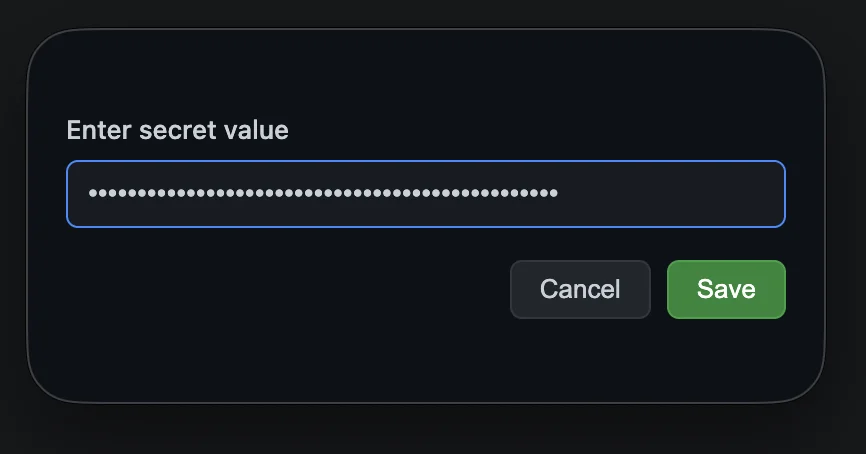
- Under Schwab API Credentials, click Set next to Client ID, paste it into "Enter secret value", and click Save.
- Do the same for Client Secret.
- Under Schwab Connection, set Callback Port to the port in your callback URL.
- Check Enabled, then click Save.
Only the plugin a setting belongs to can read its secret. Secrets are stored securely in the macOS Keychain.
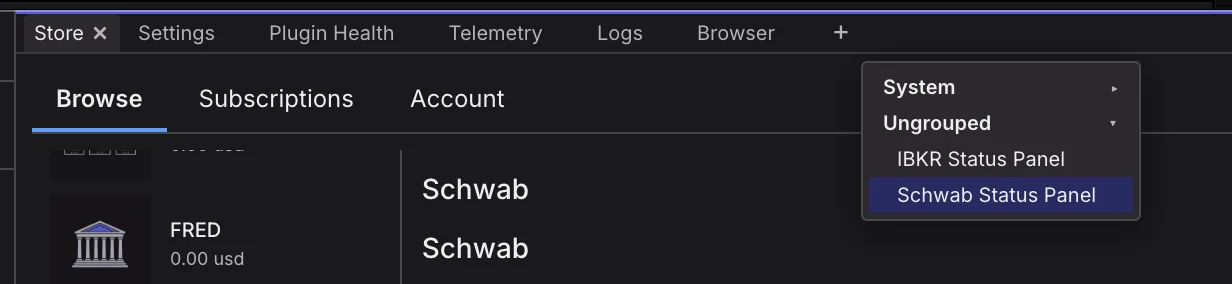
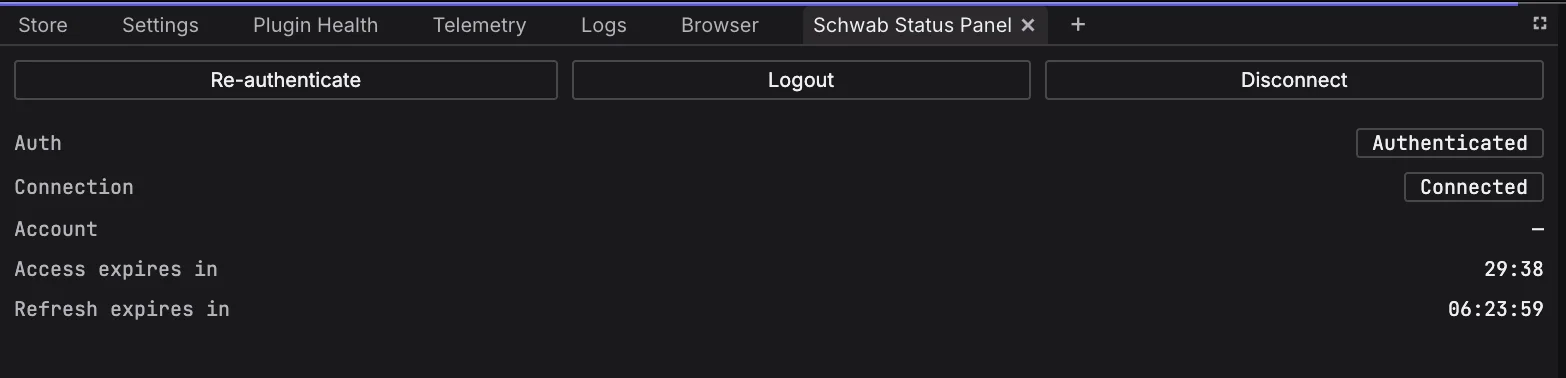
Open the Schwab Status Panel: click + in the tab bar, then Ungrouped → Schwab Status Panel.
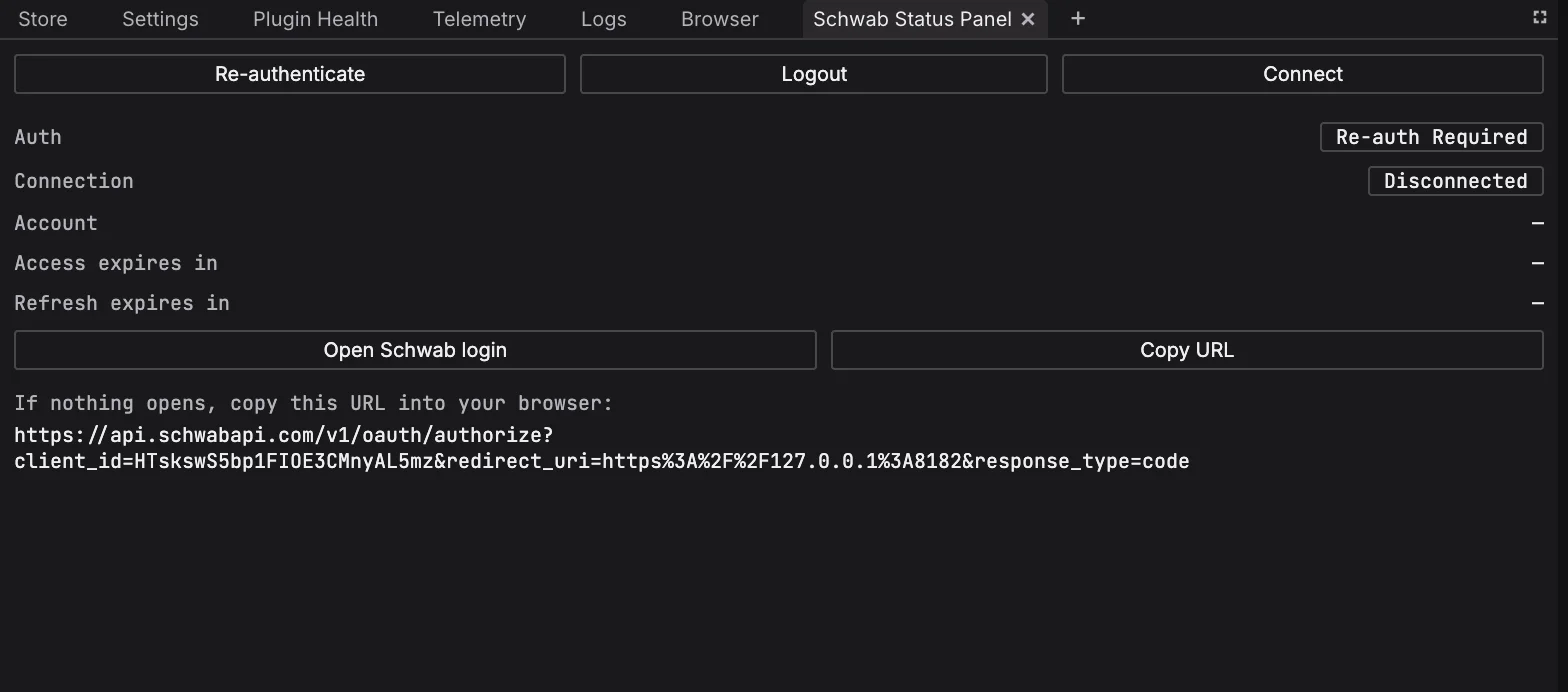
Click Re-authenticate, then Open Schwab login (or click Copy URL and paste it into your browser).
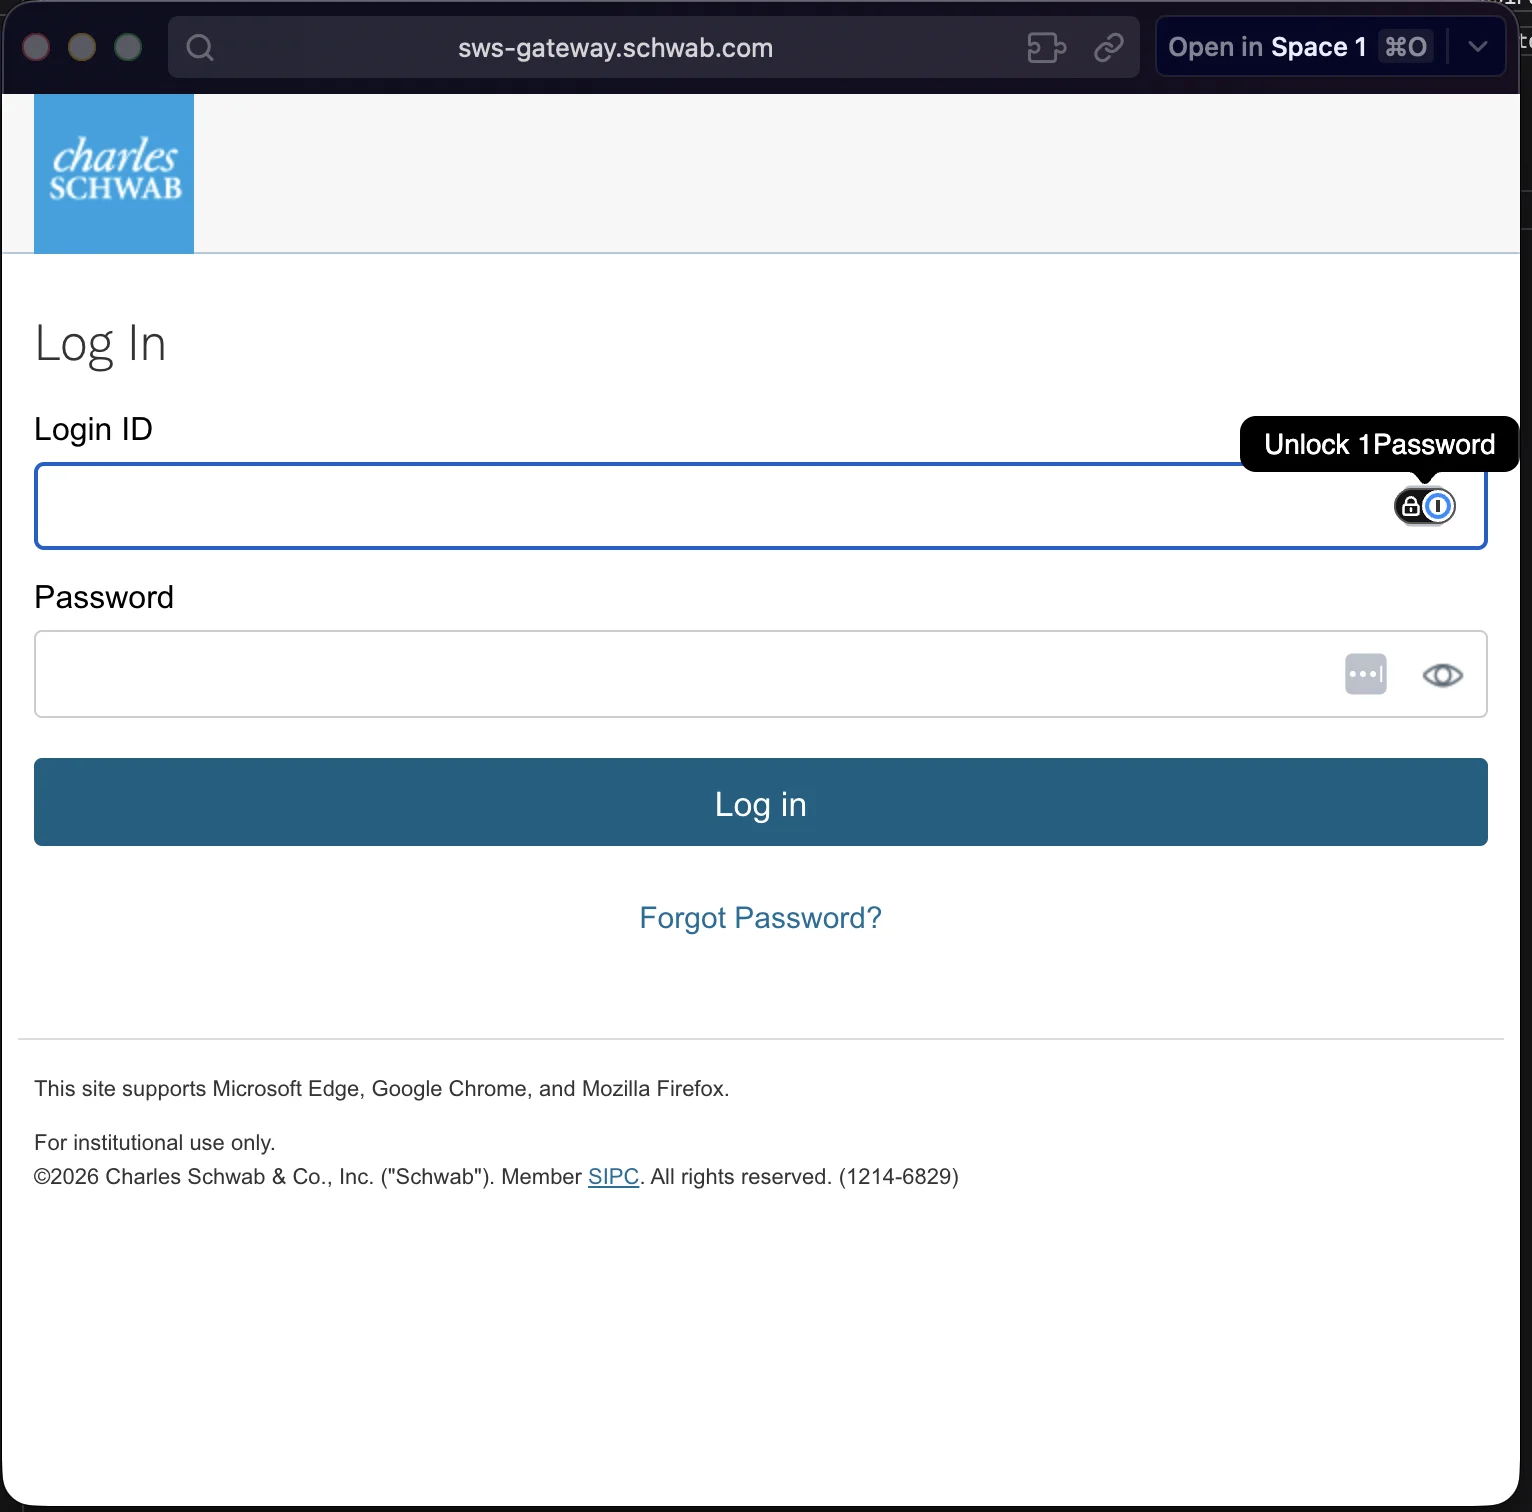
Log in with your Schwab brokerage login, NOT your Schwab Developer Portal login. Accept the terms; Schwab asks for this on every login.
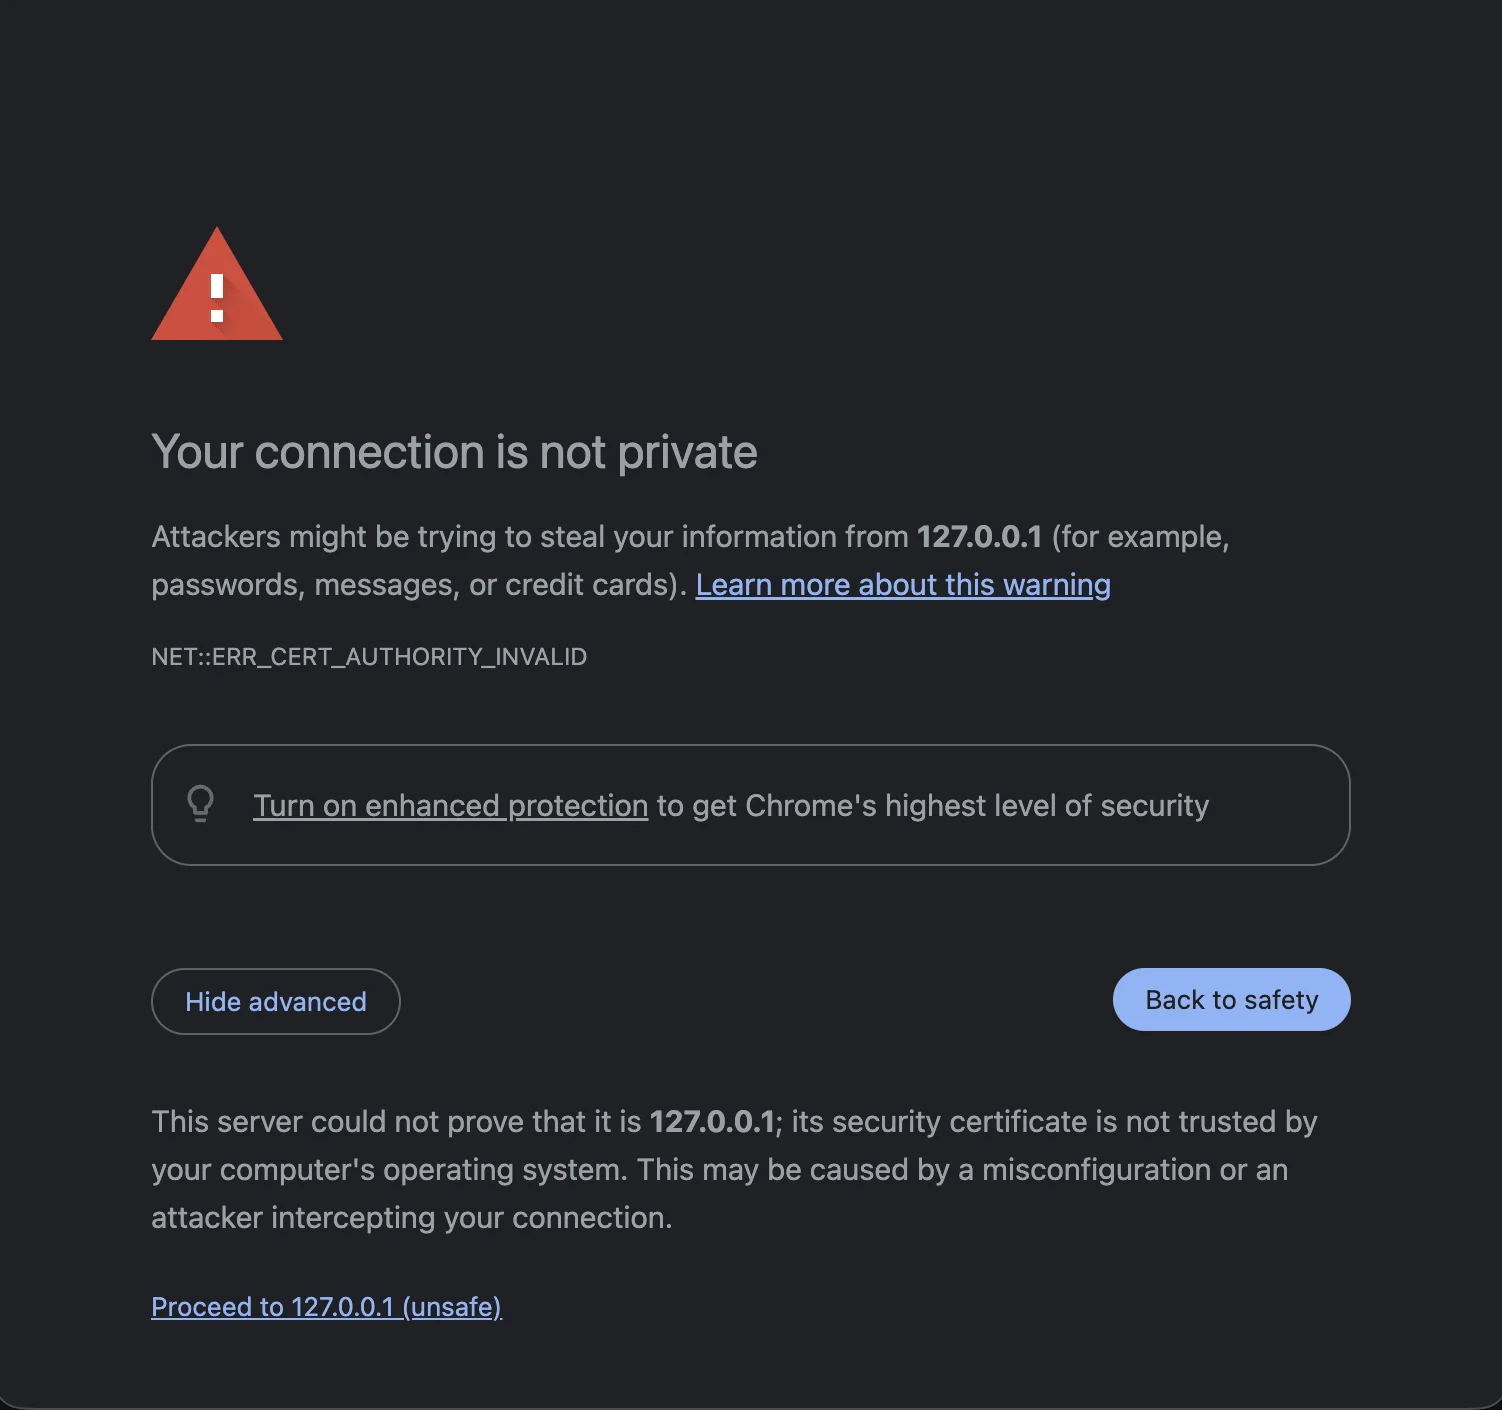
Your browser then opens the app's local callback at 127.0.0.1 and warns "Your connection is not private". This is expected: the callback server runs locally on your Mac with a self-signed certificate. Click Advanced, then Proceed to 127.0.0.1 (unsafe).
When you see "Authorization complete", close the tab and return to the app. The Schwab Status Panel shows Auth Authenticated and Connection Connected. After you restart the app, you sign in again.
4. Set up the Data Proxy
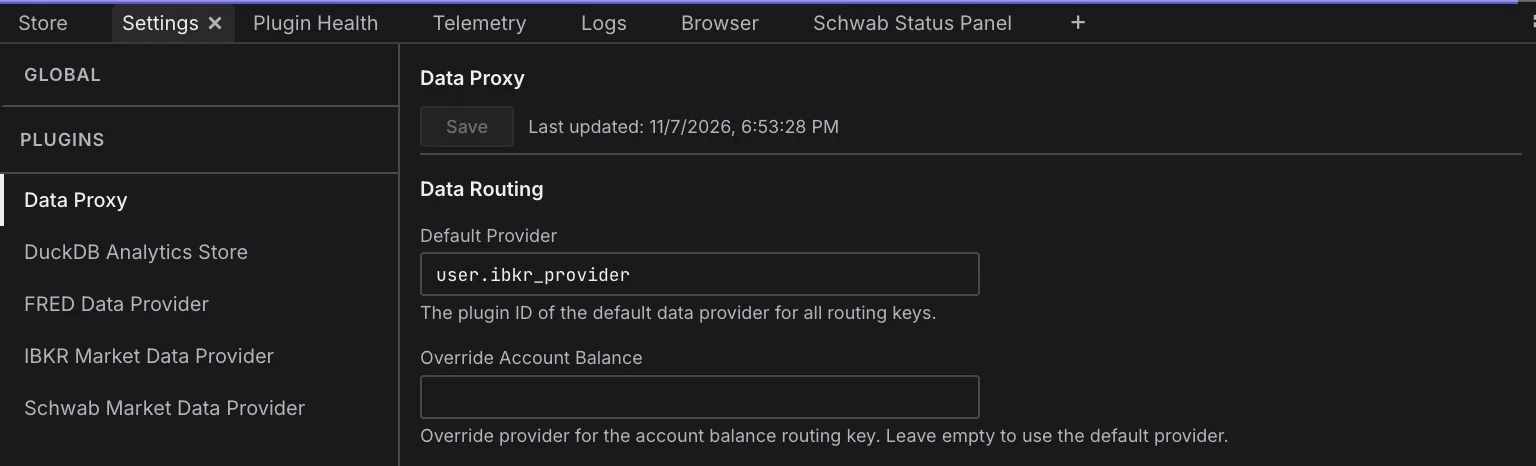
Open the Settings tab and select Data Proxy in the Plugins list. Under Data Routing, set Default Provider to
user.ibkr_providerfor IBKR oruser.schwab_providerfor Schwab, then click Save.The Data Proxy defines and enforces a consistent data format across the app and routes each kind of request to the provider you choose. For example, you can take stock data from IBKR and options data from Schwab.
5. Add your free FRED API key
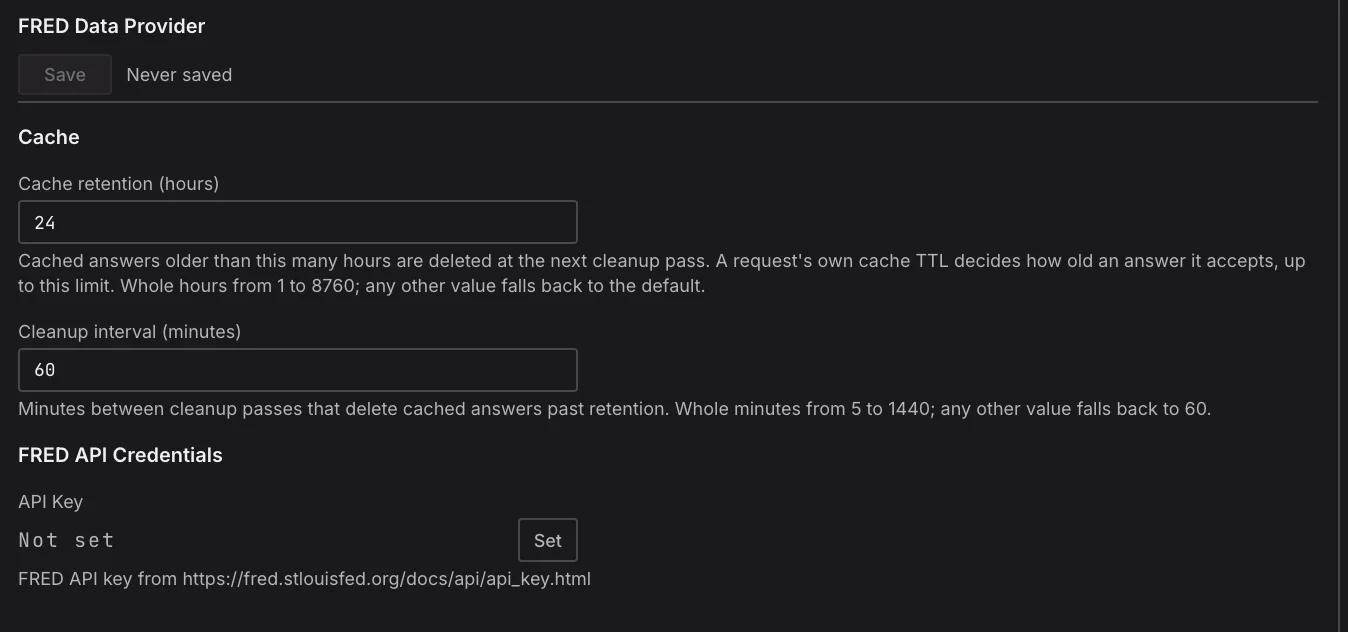
Get a free FRED API key from FRED (https://fred.stlouisfed.org/docs/api/api_key.html). Then open the Settings tab, select FRED Data Provider in the Plugins list, and under FRED API Credentials click Set next to API Key. Paste your key and save it.
6. Ask your agent
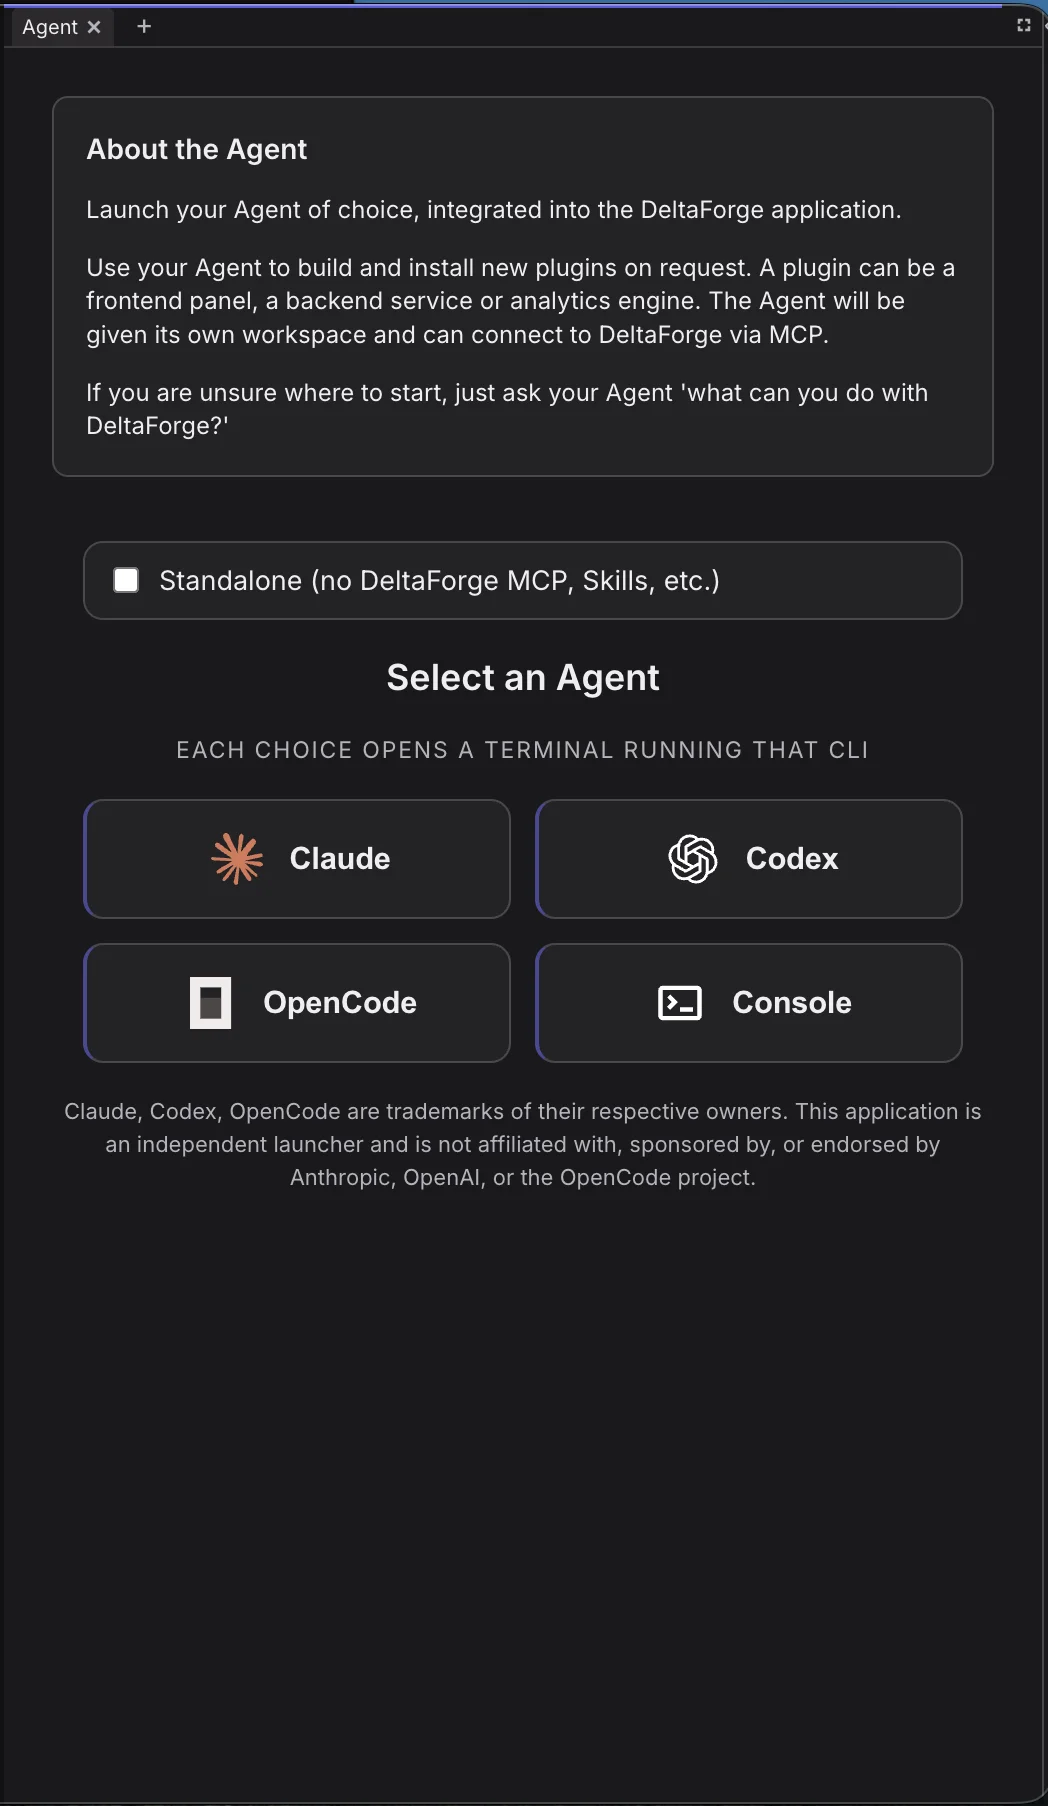
Install your coding agent (Claude Code, Codex, or OpenCode) on your Mac first. Then open the Agent tab and click the kind of Agent you want to run. Ask it a question about your account, such as what is driving your P&L today, or why a position is moving.
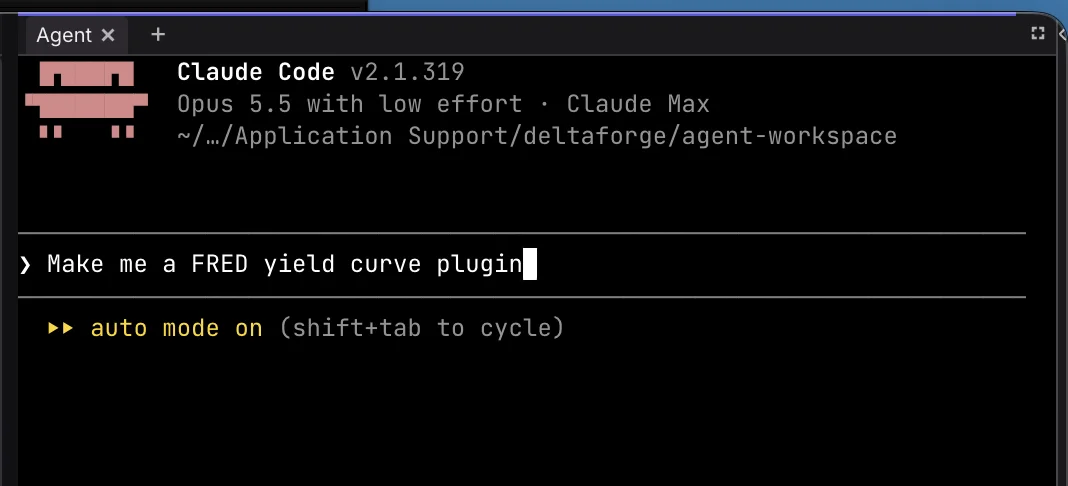
It can also build any plugin you want, such as a yield curve built on data from the FRED provider. The Agent can install the plugin it builds, take screenshots, and interact with it, so it can test its own work.
7. What the Agent can use
Every Agent you launch from the Agent tab is connected to the app's MCP server and gets the same tools and skills, whether it runs Claude Code, Codex, or OpenCode.
MCP tools
These tools are built into the app. Installed plugins add no tools of their own: the Agent reaches every installed plugin's data through the generic plugin and data tools below.
Discover plugins and data
list_plugins- Lists every installed plugin with its version, runtime, and the kinds of data it publishes or accepts.
describe_kind- Shows the fields and meaning of one plugin's data kind, plus the reply it answers with.
list_frontend_atoms- Lists the app state values a frontend plugin can subscribe to.
list_design_tokens- Lists the app's theme colors and style tokens a frontend plugin can use.
Read and request data
publish_to_kind- Sends a request to a plugin and returns its reply.
read_state- Reads the latest data one plugin published for one kind.
list_state_family- Reads the latest data for every kind one plugin publishes.
get_plugin_status- Reads a plugin's current status and message, or lists every plugin's status.
list_settings- Lists each plugin's settings and the app's global preferences with current values; secrets show only whether they are set.
Install and manage plugins
install_plugin- Installs a plugin, or a group of plugins that depend on each other, from a source folder.
upgrade_plugin- Upgrades an installed plugin to a new version.
upgrade_plugin_group- Upgrades every plugin in a group together.
uninstall_plugin- Uninstalls a plugin, or its whole group. Built-in plugins and plugins shipped with the app are refused.
generate_bindings- Regenerates a plugin's typed code after a data schema change, without a full install.
prepare_workspace- Sets up a plugin folder for local type-checking and tests against the app's SDK.
Plugin store
list_store_catalog- Lists every store bundle and feature with its price and installed or update status.
get_store_listing- Shows one store listing's plugins, what you already own, and the price of the rest.
See the app
list_panels- Lists the open panels by tab name and panel id.
capture_screenshot- Takes a screenshot of the whole app or one panel. By default you approve each capture first.
Use the app
ui_snapshot- Reads the app's buttons, fields, and other controls as an accessibility tree.
ui_click- Clicks a control in the app.
ui_type- Types text into a field in the app.
ui_key- Presses a key or keyboard shortcut in the app.
ui_scroll- Scrolls over a control or point in the app.
ui_hover- Moves the mouse over a control to open tooltips and hover menus.
Agent skills
plugin-authoring- How to write, build, test, install, and uninstall a plugin: manifest, runtimes, SDK, and common mistakes.
topic-discovery- How to find which plugins are installed, which data kinds each one owns, and which accept requests.
chart-styling- How to draw charts in a frontend plugin with the app's theme colors.
cli-setup- How to connect an agent CLI running outside the app to DeltaForge's MCP server.